If you’ve ever stood in front of a large gantry machining center watching a raw block of metal get carved into a complex aerospace component or heavy-duty industrial part, you know the secret to that precision isn’t just in the cutting tool—it’s in how well the worktable is aligned. As a gantry machining center supplier who’s spent over 15 years walking installation sites, troubleshooting alignment issues, and training operators, I’ve seen firsthand how even a 0.001-inch misalignment on the worktable can turn a $10,000 billet of titanium into scrap. It’s not rocket science, but it is a meticulous process that requires attention to detail, the right tools, and a deep understanding of how gantry systems move. Today, I’m breaking down exactly how to ensure your worktable stays properly aligned—straight from the field, not a textbook. Gantry Machining Center
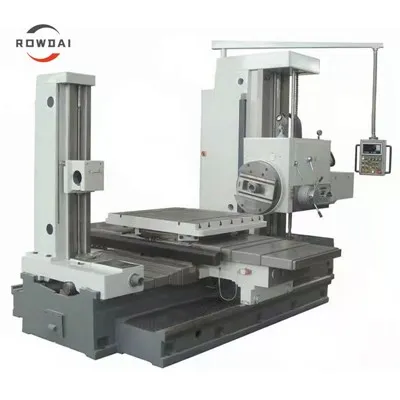
First, let’s set the stage: gantry machining centers are different from vertical mills or horizontal boring mills because the cutting head moves along the gantry rails that span over a large worktable, which is usually stationary (or moves only along the X-axis, depending on the design). This means the worktable isn’t just a surface to clamp parts to—it’s a critical reference plane for every cut. Misalignment here doesn’t just cause poor surface finish; it leads to dimensional errors across the entire part, uneven tool wear, and even damage to the machine’s gantry drives over time. I once worked with a fabricator who skipped alignment checks before a 10-hour run on a 5-axis gantry, and by the time they finished, the 20-foot long structural beam they were making was off by 0.02 inches at one end. Fixing that required re-machining half the part and a full realignment of the gantry, costing them two days of downtime and thousands in lost production. That’s why alignment isn’t a one-time setup step—it’s a routine practice that should be built into your maintenance schedule.
Let’s start with the pre-alignment prep work, because rushing this part is where most people go wrong. Before you even touch a precision level or a laser alignment tool, you need to make sure the machine is at the right temperature, secured properly, and free of any debris. Gantry machining centers expand and contract with ambient temperature; if you’re performing alignment first thing in the morning when the floor is cold, then running the machine all day and checking alignment in the afternoon when the shop is 10 degrees warmer, your measurements will be inaccurate. I always tell my clients to let the machine run through a full cycle (even if it’s a dry run with no tooling) for 2 to 3 hours before performing alignment. That lets all the components reach their operating temperature, so you’re not compensating for thermal expansion during cuts. Next, check the foundation. A gantry is a heavy machine—some of our largest models weigh over 50 tons—so if the concrete foundation isn’t properly cured or has settled unevenly, the worktable will shift over time. I’ve seen foundations crack because the shop added new heavy equipment next to the gantry, throwing the worktable 0.03 inches out of level in a week. Before any alignment, verify that the foundation bolts are tightened to the manufacturer’s specifications, and use a rough level (a builder’s level works here) to check for major unevenness across the table. If the foundation is off, fixing that first will save you hours of unnecessary work later.
Now, the actual alignment of the worktable itself. There are three key measurements you need to check here: levelness along the table’s length (the Y-axis, if you will), levelness across its width (the Z-axis for the table), and squareness between the worktable and the gantry’s primary rails. Let’s start with levelness, because that’s the foundation for all other measurements. For small to medium gantries (under 10 feet of table length), a precision spirit level (at least 0.0005-inch per foot accuracy) works, but for larger tables—like the 30-foot models we supply for wind turbine component manufacturing—laser alignment tools are non-negotiable. I recommend using a dual-axis laser level, because it can measure both axis tilt at the same time, cutting your check time in half. To check levelness along the table: clamp the laser level to the worktable near one end, turn it on, and mark the reading at that position. Then, move the laser (or use a stationary transmitter if you have a fixed tooling plate) to the opposite end of the table, 30 feet away, and take another reading. The difference between the two should be no more than 0.002 inches per foot, per ISO 10360-2 standards for machining center accuracy. If it’s off, you’ll adjust the worktable’s mounting shims—not the gantry rails, that’s a common mistake. Shims are thin, precision-cut metal or plastic strips placed between the worktable’s base and the foundation. Make small adjustments: add or remove shims of 0.001-inch increments at a time, then recheck the level. For a 20-foot table, I usually don’t aim for perfect zero, but for a deviation of less than 0.005 inches across the entire length. Any more than that, and you’ll get a taper on long parts.
Next, check the worktable’s squareness to the gantry rails. This is where a lot of operators get confused—levelness is flat, squareness is the 90-degree angle between the table and the gantry’s X-axis rail. If the table is not square to the gantry, when the cutting head moves along the rail, it will cut parts that are wider at one end than the other, even if the table is perfectly level. To test this, use a precision square or a laser square. For manual checks, place a master square on the worktable, slide the cutting head (or a test spindle with a dial indicator) to the end of the square, and take a reading along the square’s edge, then move the spindle to the other end. The difference in readings should be less than 0.001 inches per foot. For larger gantries, a laser square is better because it can measure the entire 30-foot span at once. If the squareness is off, you’ll adjust the table’s side shims, not the gantry. I always mark the shim positions before loosening the table bolts, so if I make an adjustment that’s too much, I can backtrack. Last year, a client tried to fix squareness by adjusting the gantry rails instead of the table, and ended up with a $15,000 repair because they threw the entire gantry’s axis alignment off. The key here is: the worktable is the reference, so all adjustments should be made to it, not the moving components.
Once you’ve got the static alignment done, you need to test dynamic alignment, because a worktable that’s perfectly flat when stationary can shift when the gantry is moving at full speed. That’s because gantries have moving masses—when the gantry accelerates along the rails, it creates force that can tilt the worktable or shift its position slightly. To test dynamic alignment, run the gantry through its full range of motion at 50%, 75%, and 100% of its operating speed, while monitoring the worktable with a dial indicator or laser tracker. Make several runs, stopping at different positions along the rails, and check the table’s level and squareness each time. I also recommend performing a test cut: machine a simple 2×2 foot square plate, then measure the diagonal of each corner. If the diagonals differ by more than 0.002 inches, your dynamic alignment is off. Most of the time, dynamic misalignment is caused by loose table bolts or uneven foundation support, so tightening the bolts again and rechecking shims will fix it. In rare cases, it’s a problem with the gantry’s drive system, but that’s less common with regular maintenance.
Now, let’s talk about routine maintenance to keep alignment consistent. Alignment isn’t a set-it-and-forget-it task. I advise all our clients to perform a full alignment check every 1,000 operating hours, or at least once a quarter, whichever comes first. But there are quick checks you can do monthly: wipe down the worktable and the surrounding area to remove chips and coolant that can warp the table surface over time, tighten the worktable’s mounting bolts to the manufacturer’s torque specifications, and check for any signs of wear on the shims or foundation. Also, if you move any heavy equipment near the gantry, or if you have a new operator running the machine that’s clamping parts incorrectly (over-tightening clamps can bend the table), schedule an alignment check right after. I once had a client who skipped a routine check because their shop was busy, and a clamp that was tightened 20 lbs over spec bent the worktable just enough to cause a series of scrap parts. They ended up needing a worktable resurfacing, which cost more than the alignment check would have.
Another common mistake I see is using the wrong tools for alignment. A lot of operators use a standard carpenter’s level, which only has an accuracy of 0.01 inches per foot—way too coarse for gantry work. You need tools with at least 0.0005-inch per foot accuracy, and laser tools are worth the investment for larger machines. Also, always calibrate your alignment tools before each use. A laser level that’s not calibrated will give you false readings, just like a set of calipers that’s not zeroed. I keep a calibration log for all the tools we use on installation sites, and I recommend our clients do the same—note the date of calibration, the tool used, and the alignment measurements. If something goes wrong with a part, you can go back to the log to see if alignment was the cause, or if it was a tool error.
Let’s also address a few specific scenarios that cause alignment issues for our clients. First, worktable resurfacing. If the table gets scratched or warped from heavy cutting, you’ll need to resurface it. But when you do, you have to re-align the table after resurfacing, because the material removed changes the table’s reference plane. I always work with our clients’ machinists to coordinate resurfacing and alignment, so the table’s new flatness matches the gantry’s axis. Second, temperature fluctuations in the shop. If your shop doesn’t have climate control, alignment will shift throughout the day. The solution here is to perform alignment checks at the same time every day, and adjust your cutting programs to compensate for minor temperature changes if needed. Third, overloading the worktable. Exceeding the worktable’s weight capacity (we rate all our tables with a 15% safety factor, but some operators push that) will cause the table to flex, leading to misalignment. I’ve had a client load a 10,000 lb part on a 8,000 lb capacity table, and by the end of the cut, the table was flexing 0.01 inches—enough to ruin a $20,000 aircraft wing component. Sticking to the weight limit isn’t just a safety thing; it’s critical for alignment.

Now, let’s get real about what “proper alignment” actually means. It’s not about perfection—it’s about consistency that meets your part’s tolerance requirements. If you’re machining rough structural parts that have a tolerance of ±0.01 inches, then a deviation of 0.005 inches across the table is acceptable. But if you’re machining medical device components with a tolerance of ±0.0005 inches, you’ll need to hold alignment to much tighter standards, maybe 0.001 inches across the table. I never tell clients to aim for a “perfect” alignment number, because that’s unrealistic and leads to overworking the machine. Instead, align the table to the tolerance of the parts you’re producing, and recheck whenever something changes.
Cylindrical Grinding Machine At the end of the day, the worktable is the backbone of your gantry machining center. A properly aligned table reduces scrap, extends tool life, and keeps your production running smoothly. If you’re struggling with recurring alignment issues, or if you’re installing a new gantry machining center and want to make sure the worktable is set up correctly from the start, we’re here to help. We provide on-site installation support, routine maintenance packages, and alignment training for your operators to ensure your machine runs at peak performance. To learn more about our gantry machining center solutions and worktable alignment services, please reach out for a procurement consultation with our team.
References
- ISO 10360-2:2009, Geometrical Product Specifications (GPS) – Acceptance and reverification tests for coordinate measuring machines (CMM) – Part 2: CMMs used for measuring linear dimensions
- Machining Center Maintenance Handbook, 3rd Edition, National Machine Tool Builders Association, 2021
- Laser Alignment Best Practices for Large Machine Tools, American Society of Mechanical Engineers (ASME) B89.1.12-2019
- Thermal Growth Compensation for Gantry Machining Systems, Journal of Manufacturing Processes, Vol. 45, 2020
Henan Rowdai Machinery Equipment Co., Ltd.
As one of the most professional gantry machining center manufacturers in China, we’re featured by quality products and good price. Please rest assured to buy high-grade gantry machining center for sale here from our factory. If you have any enquiry about cooperation, please feel free to email us.
Address: Building 9, E-Commerce Industrial Park, High-Tech Zone, Zhengzhou, Henan, China
E-mail: rowdai@rowdai.com
WebSite: https://www.rowdai.com/
